Client Records & Contacts
Once a lead turns into real business, it lives in the Client section — your customer database, with every company or homeowner you do work for, and their own contacts, tasks, and communication history attached.
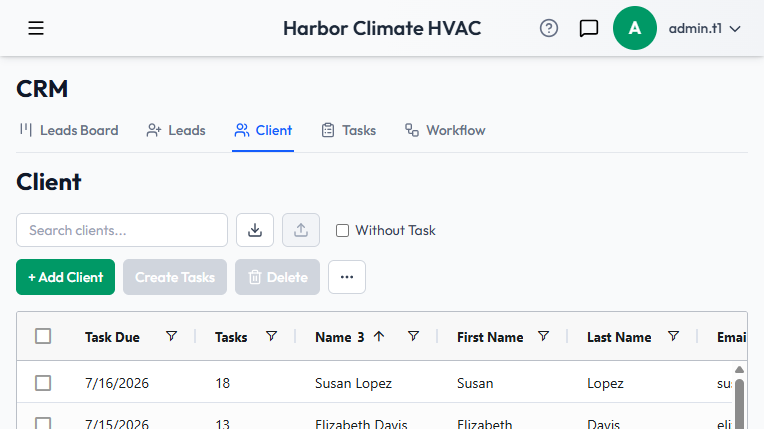
The Client grid
Columns include Name, contact info, address, industry, website, and task-due status. Every column is sortable, filterable, resizable, and your layout is saved to your profile. Website links in the grid are clickable. A Without Task checkbox filters down to clients with no follow-up attached yet — useful for spotting accounts nobody's checked in on.
Adding a client
Click + Add Client. Name is the only required field — everything else is optional, so you can create a bare-bones record fast and fill in the rest later. There's a single address block rather than separate billing and service addresses.
Opening a client
Editing a client opens a tabbed detail panel:
- Notes Summary — a rolled-up view of the client's tasks, communications, and notes in one place. Double-click a task here to jump straight to the Tasks tab. This is the fastest first stop when reopening an existing client.
- Contacts — full add/edit/delete management of every person tied to this client, separate from the client's own primary contact info
- Tasks — create and manage tasks linked directly to this client
- Communication — a history of emails sent to and from this client
- Notes — free-form notes on the account
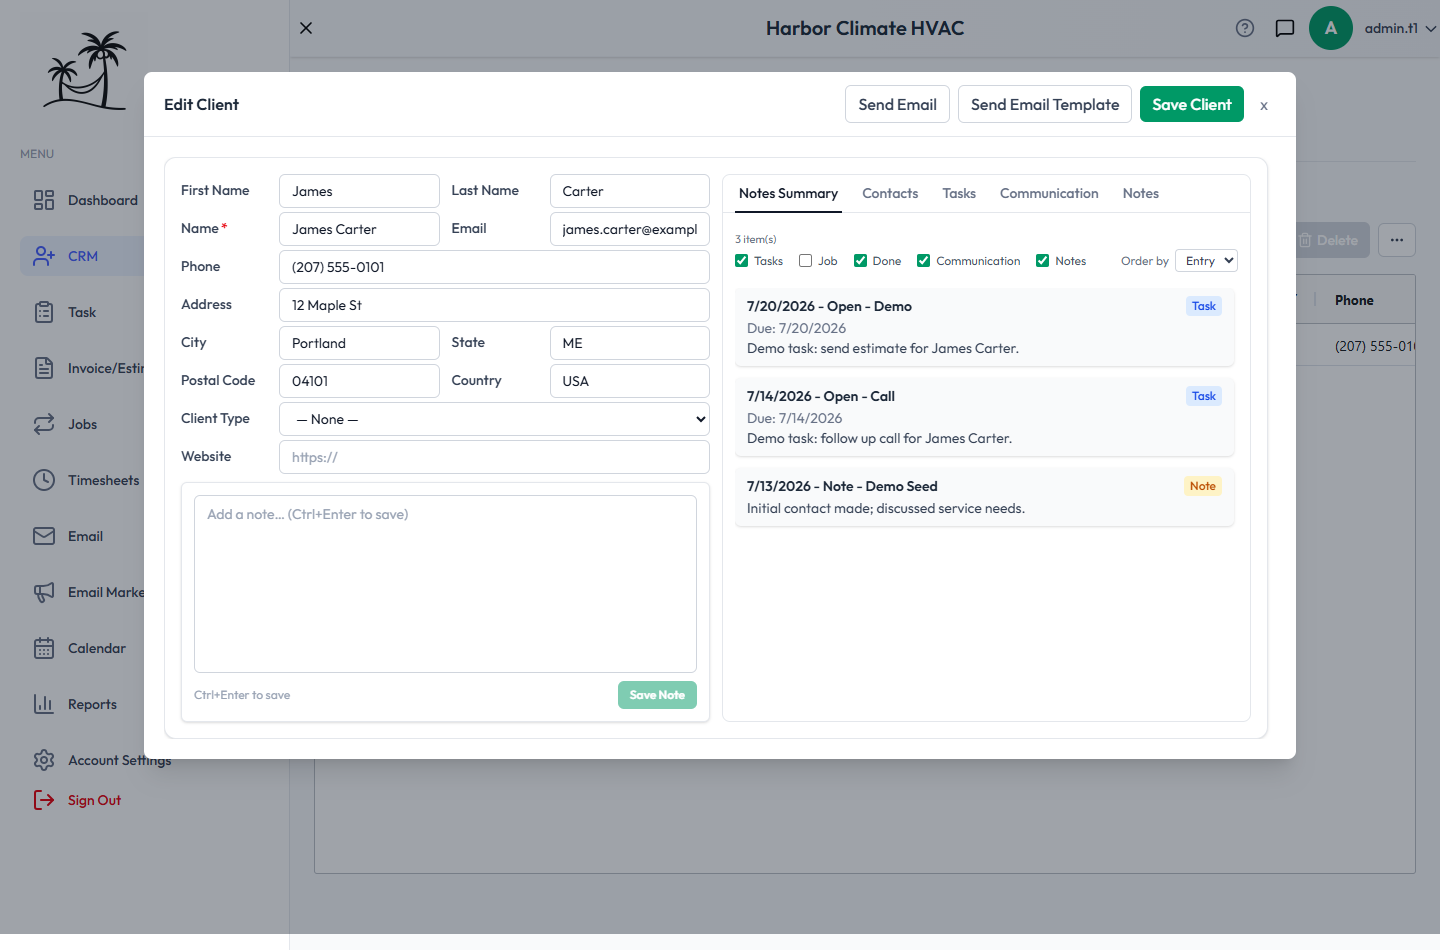
The client record itself doesn't have a jobs, invoices, or estimates tab — those live on their own pages and are linked to the client behind the scenes rather than surfaced here.
Working with many clients at once
Select multiple rows to unlock Export Selected, Create Tasks, Send Campaign, and Delete.
Importing clients
Use Import to upload a CSV. Columns auto-match by header name, and you can drag columns onto the correct field — even combining two source columns into one. You can map up to three contacts per row (each needs at least a first and last name to be created). The preview shows Total, Ready, and Warning counts before you confirm; rows missing both a phone and a website are flagged. Each row imports independently, so a handful of failures doesn't block the rest.
How leads become clients
Clients are created from the Leads section via Promote to Client — see Creating and Qualifying Leads. Promotion is safe to re-run: if a lead is already linked to a client, promoting it again won't create a duplicate.
Tips
- Fill in a client's address as soon as you have it — it's used to plot job locations on the Jobs day-map and to calculate route optimization, so accurate addresses make scheduling more useful automatically.
- When importing, do a small test batch first if you're mapping multiple contacts per row.
- Keep the Notes Summary tab as your first stop when reopening a client — it's the fastest way to see what's happened recently without clicking through every tab.