Creating and Sending Estimates
Estimates and Invoices share the same underlying pattern — a grid, an editor, your service catalog, and PDF export — tied together by one important workflow: turning an accepted estimate into an invoice with one click.
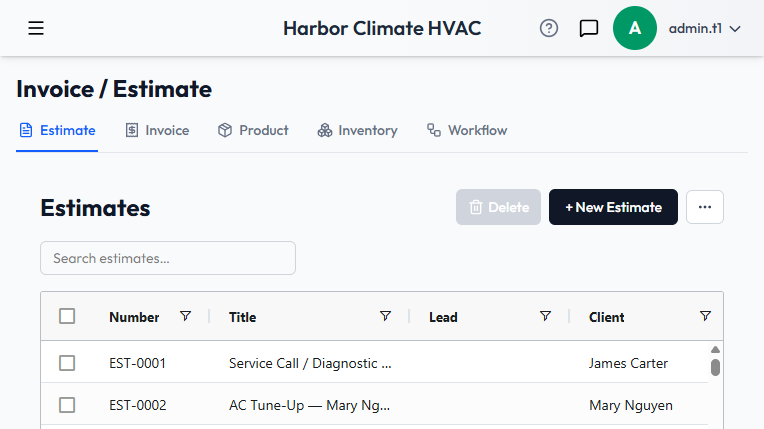
The Estimates grid
Columns: Number, Title, Lead, Client, Status, Total, Issue Date (newest first by default), Valid Until, and Assigned To. Select multiple rows to bulk Delete, with a confirmation first. Double-click a row to open it, or + New Estimate to start one. Each row also has its own quick Convert action.
Creating an estimate
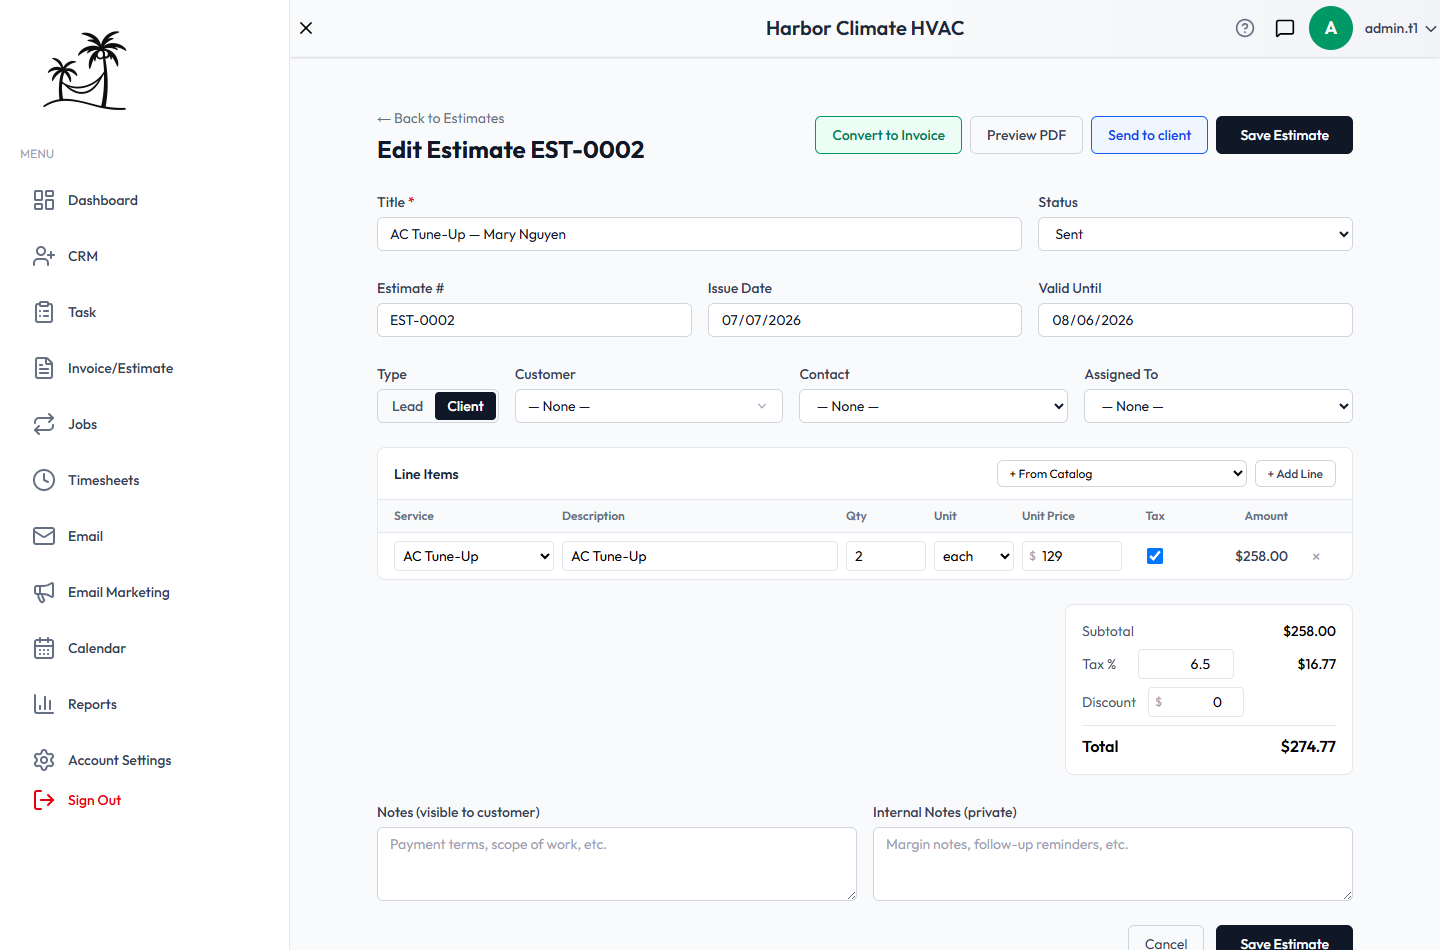
- Title is the only required field.
- Status starts as Draft and moves through Sent, Accepted, Approved, Declined, or Expired — set manually as the deal progresses, or automatically once a customer approves it through the portal (see below).
- Issue Date defaults to today; Valid Until defaults to two months out.
- Link to either a Lead or a Customer — not both — plus a contact and the assigned user.
- Line items can be typed freely (description, quantity, unit, unit price, taxable checkbox) or pulled from your Service Catalog, which auto-fills price and details. A catalog "package" automatically expands into all of its individual line items.
- Your tenant's default tax rate pre-fills; tax only applies to line items marked taxable. Discount is a flat dollar amount taken off after tax.
- Two separate notes fields: Notes (visible to the customer) and Internal Notes (visible only to your team).
Sending, approval, and PDFs
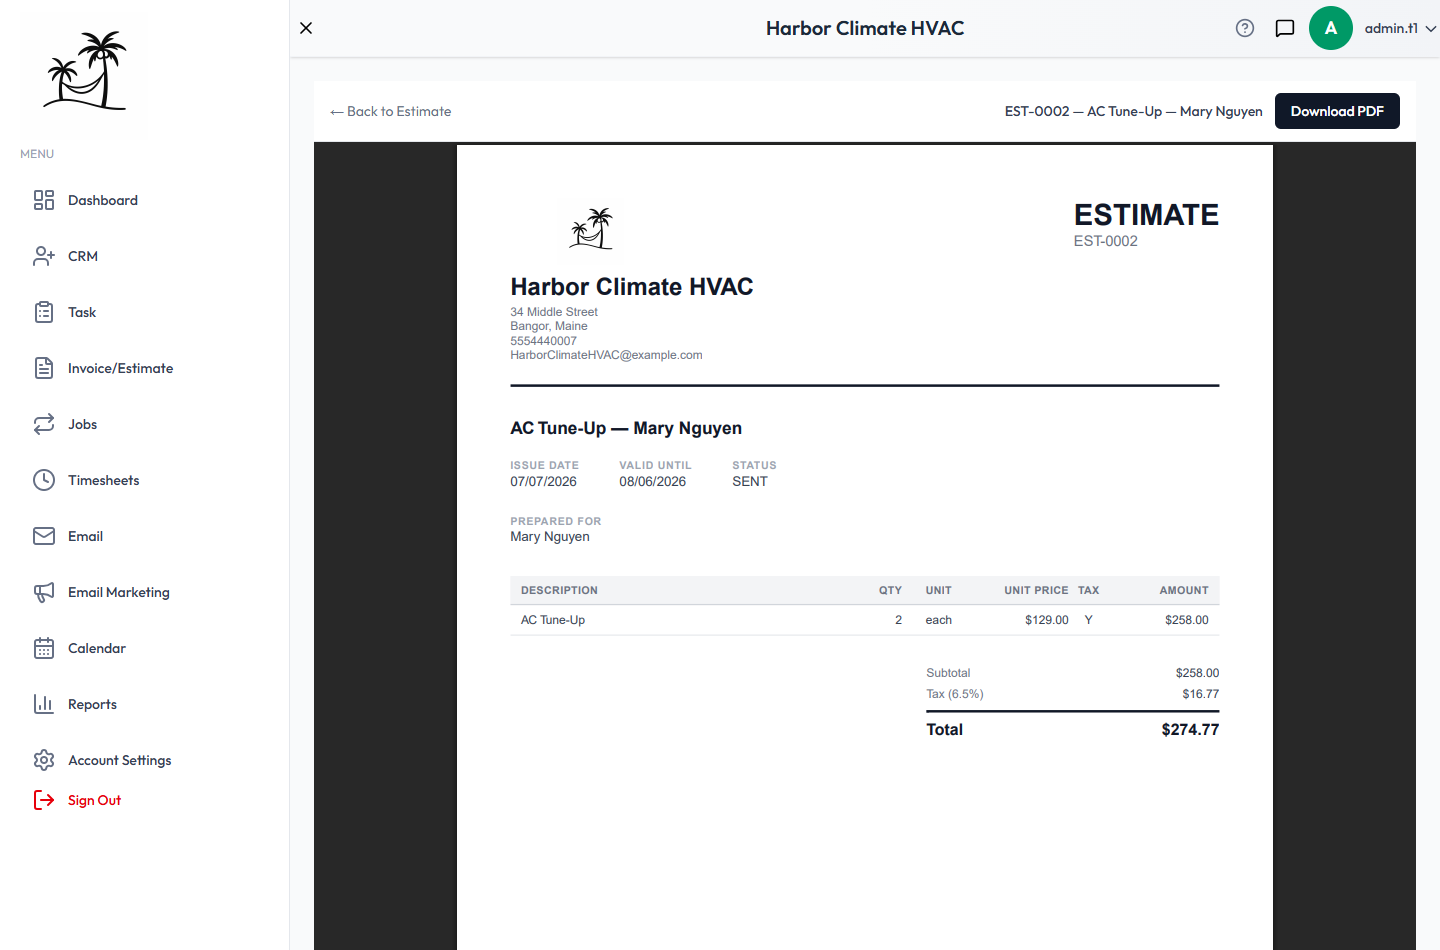
- Preview PDF generates a branded PDF including your company logo.
- Send to client emails the estimate directly from the editor, and also makes it visible to the customer through the customer portal — on Business and Growth plans, customers can review and approve an estimate themselves online, no signature chase required.
- Draft estimates are never shown in the portal — only ones you've actually sent.
Turning an estimate into an invoice
The one workflow worth understanding in detail:
- Click Convert from the Estimates grid, or Convert to Invoice from inside an open estimate.
- A new invoice is created, copying the title, lead/customer/contact, assigned user, notes, tax rate, discount, and every line item exactly as they were on the estimate.
- The new invoice always starts fresh as a Draft, dated today, due in 30 days, with payment terms automatically set to Net 30 — regardless of what the original estimate had.
- The original estimate is left completely untouched. Nothing about its status changes — the connection only shows up as a note on the new invoice referencing the estimate it came from.
You're taken straight into the new invoice to adjust dates, terms, or anything else before sending.
Tips
- Build out your Service Catalog before you need it — picking line items from the catalog instead of typing them fresh keeps pricing consistent everywhere.
- Double-check the due date and payment terms right after converting — they reset to Net 30 and won't carry over.
- Use Internal Notes for anything you don't want a client to see if they get a copy of the PDF.
- Since the original estimate never updates itself after conversion, it's worth manually marking it Approved once you convert it, so your Estimates grid still reflects reality.