How to Manage Leads in the CRM
March 10, 2026 · tropicalhilladmin
Leads are where every new inquiry lands before it becomes a job. Tropical Hill gives you two ways to work them — a full data grid and a drag-and-drop board — plus tools to bulk-manage, import, and promote leads into clients once they're won.
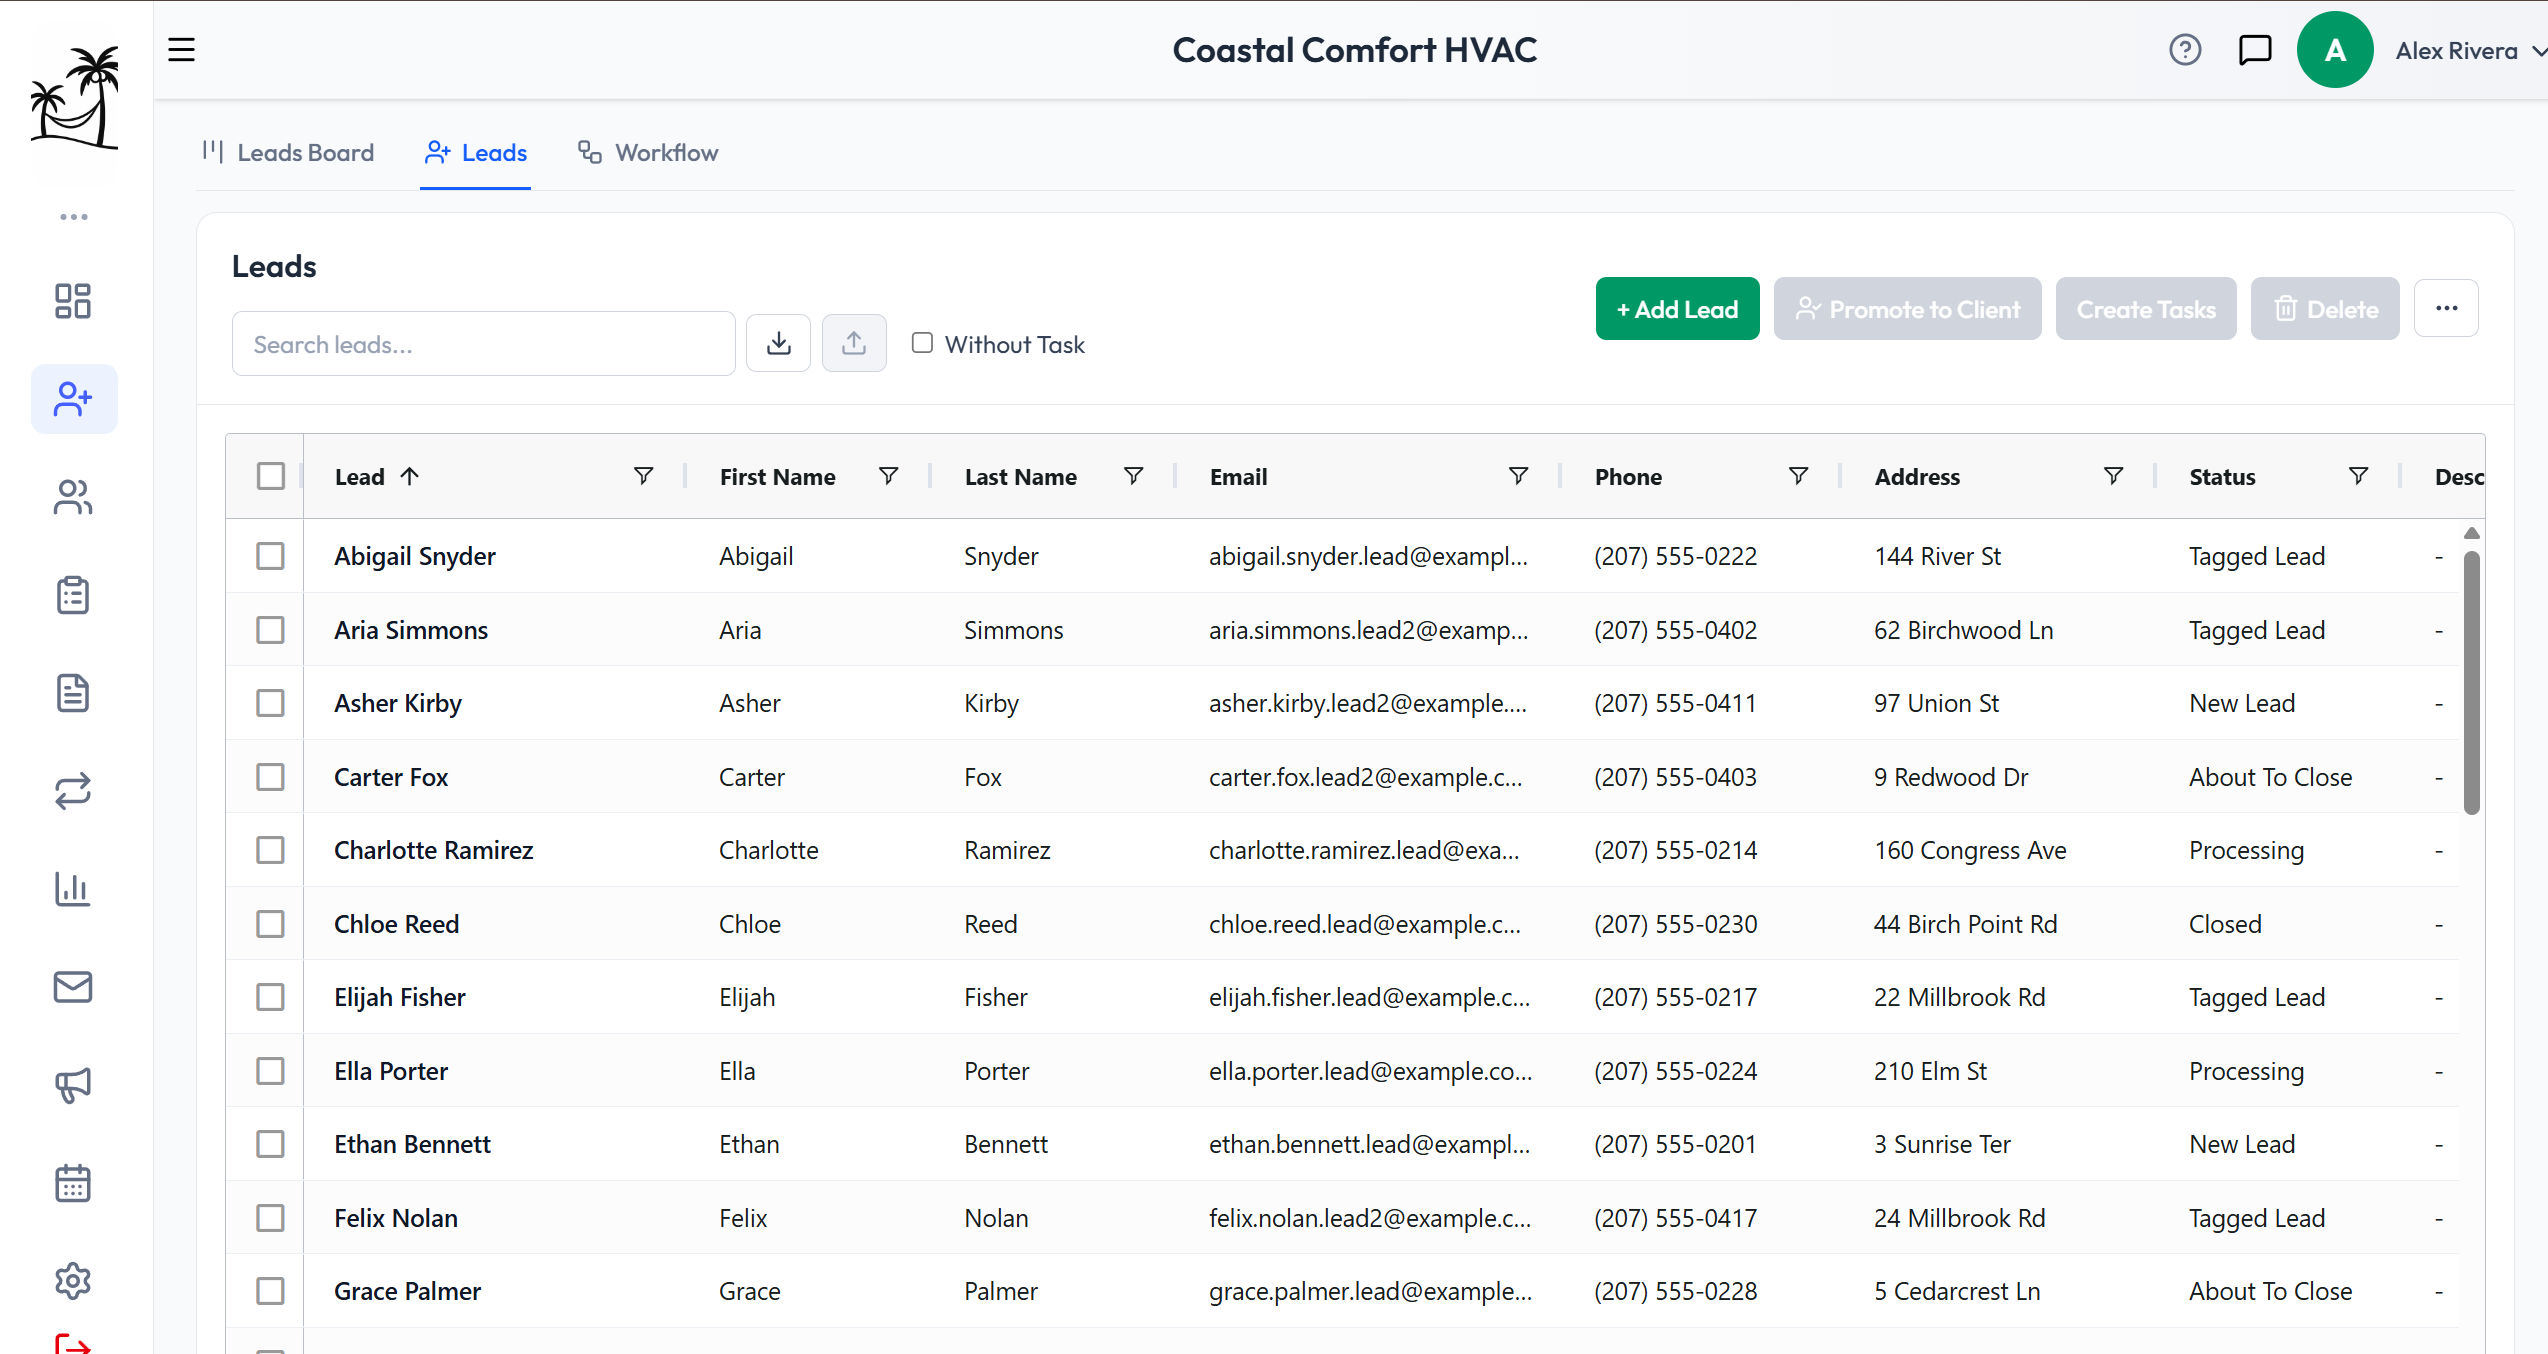
The Leads grid
This is the default Leads view: a full table of every lead with configurable columns.
Available columns include Lead name, Client/company, First/Last Name, Email, Phone, Website, Description, Status, Task Due, number of contacts, up to three additional contacts and phone numbers, Address, City, State, Postal Code, Tag, Status Code, Created At, Updated At, and Mailchimp sync status.
Click Columns to show or hide any of these — your column choices are saved to your user profile, so they stick around next time you log in.
Columns can be dragged to reorder them however you like.
The search box filters across nearly every field at once — name, email, phone, address, tag, status, and all extra contacts — so you rarely need to know which column something is in.
A Without Task checkbox filters the grid down to leads that don't have any task attached yet, which is a fast way to find leads that are at risk of going cold.
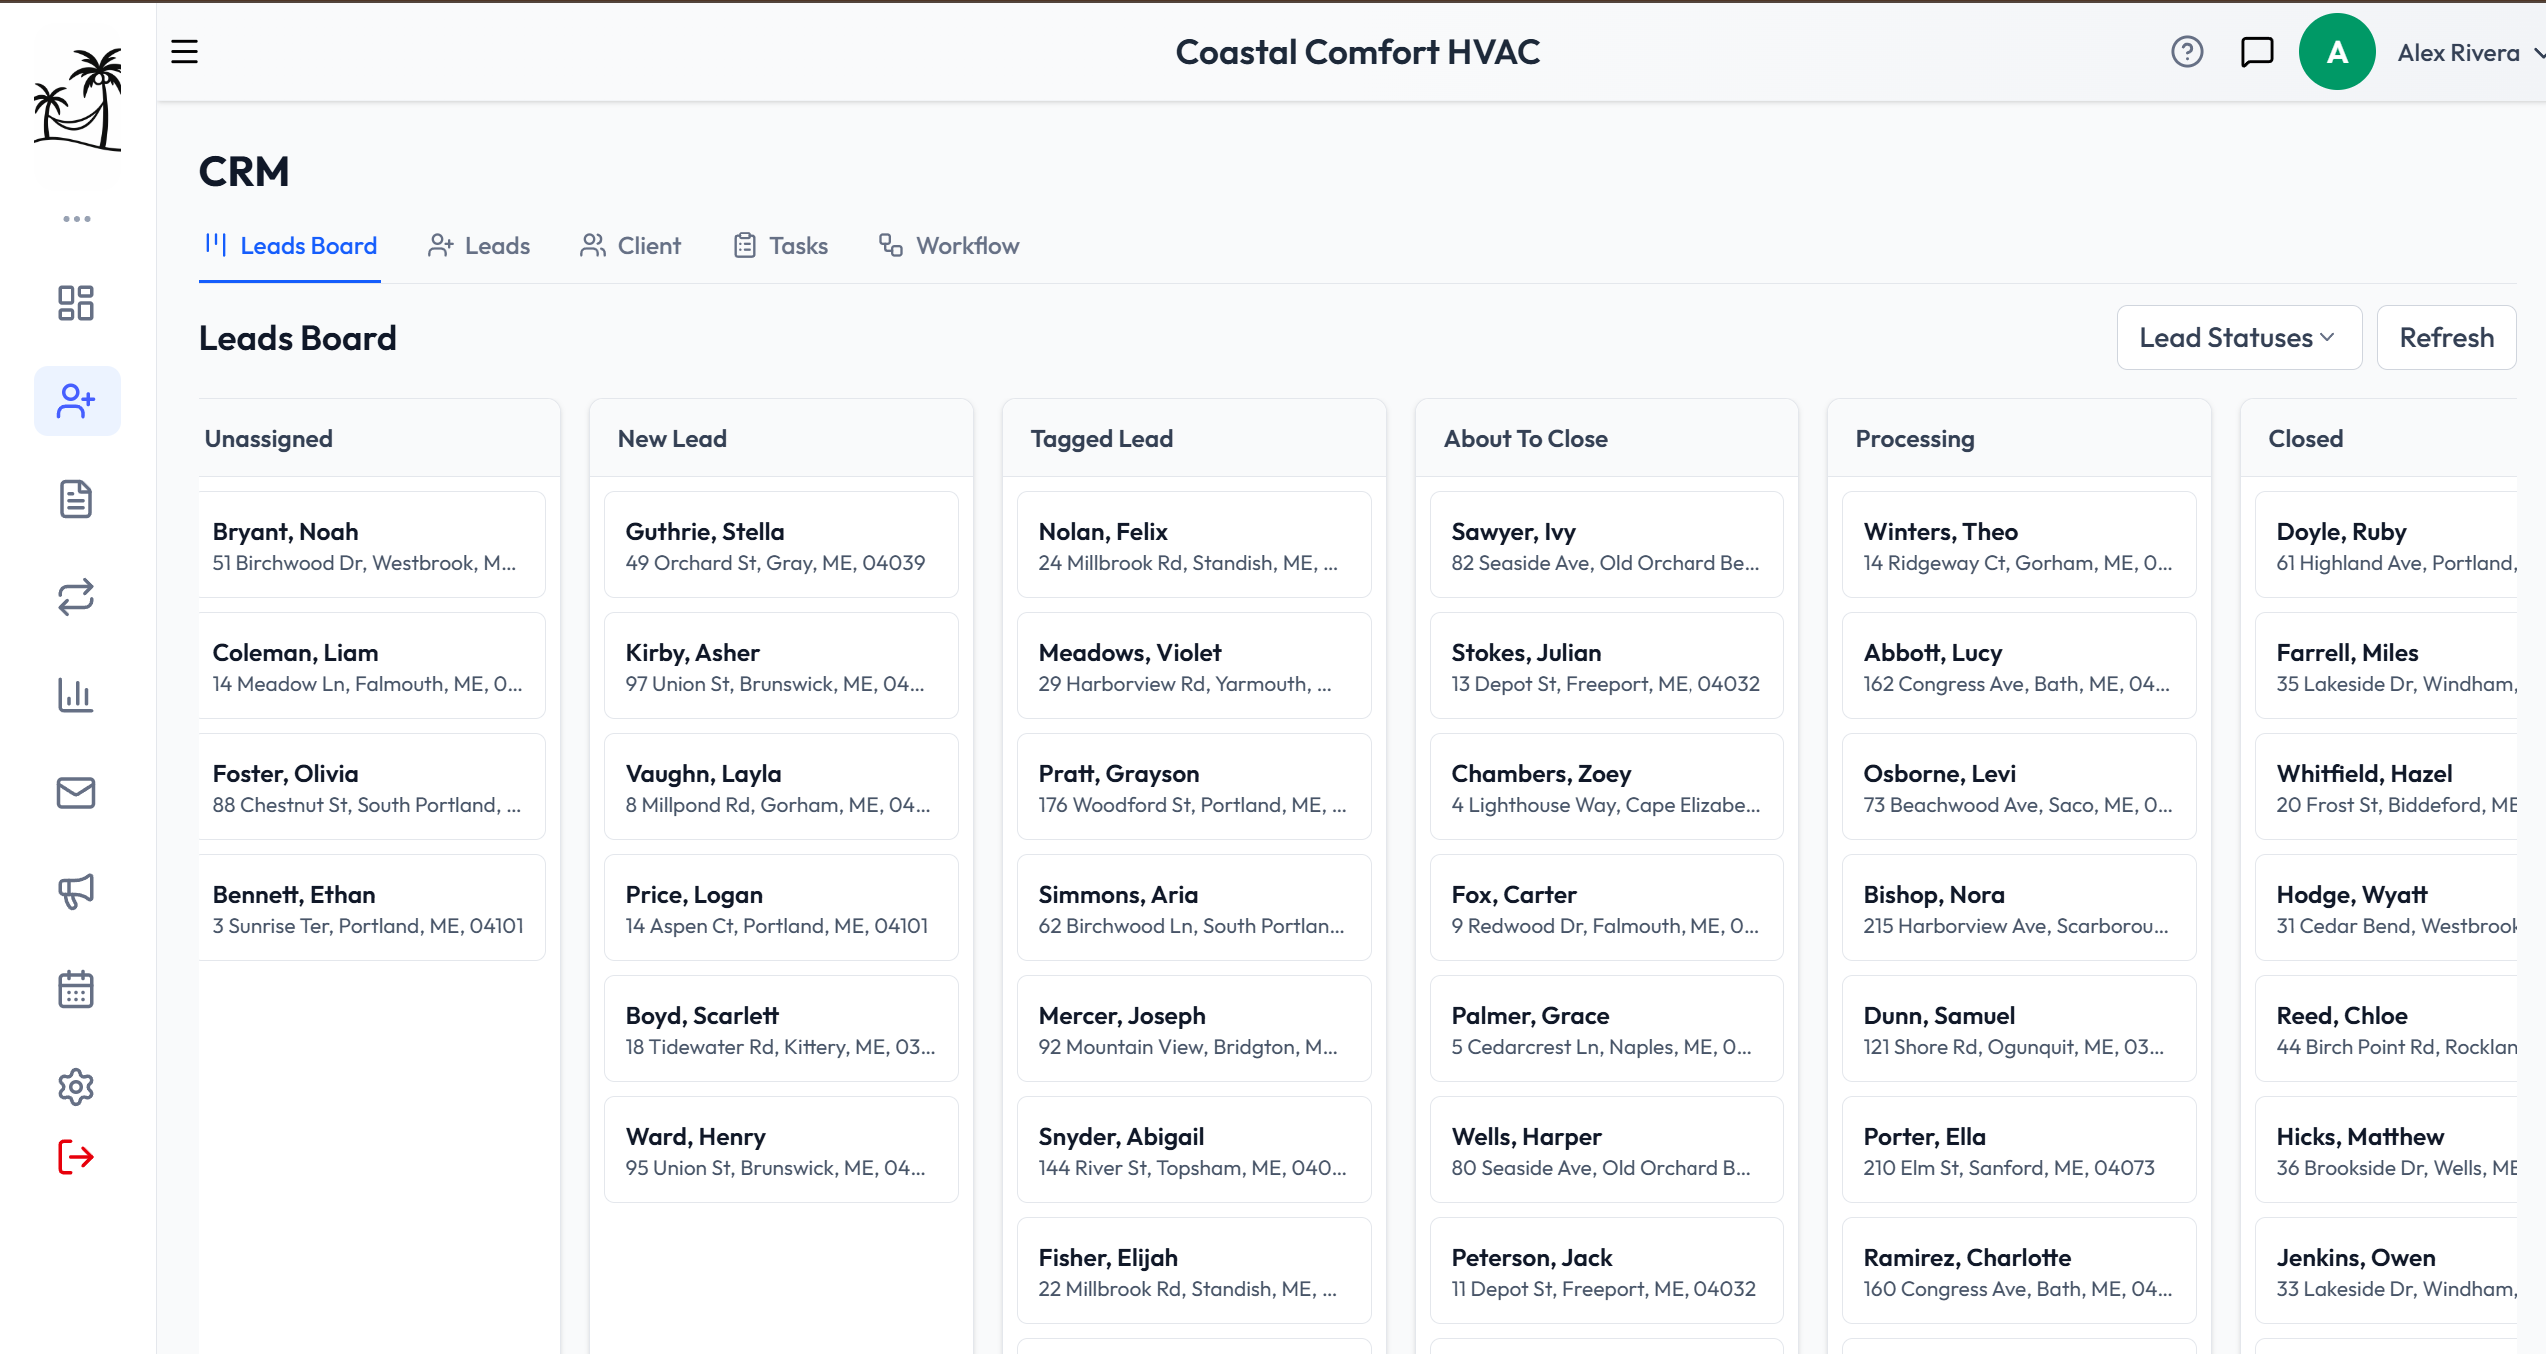
The Leads board
Switch to the board view for a kanban-style layout grouped by status.
Each column on the board is a lead status. Statuses without a column assignment fall into an Unassigned column.
Drag a lead card from one column to another to change its status — the update saves immediately.
If you drag a card into a column tied to a tag, a quick tag-picker pops up first so you assign an A–F tag before the move completes.
Click any card to jump back to the grid view with that lead's full edit panel already open.
A Lead Statuses dropdown on the board lets you view existing statuses and add a new one on the spot — just a label, its board column, and a sort position.
Adding and editing a lead
Click + Add Lead to open the lead form in a draggable, resizable window.
The only required field is the lead's name — everything else (email, phone, address, tag, status, notes) is optional so you can capture a lead fast and fill in details later.
Every lead's edit window also has Contacts and Tasks tabs, so you can add additional contacts or create a follow-up task without leaving the lead.
From the edit window you can also Send Email or Send Email Template directly to the lead.
A More options menu on the lead form gives you shortcuts straight to Tag, Lead Status, and Contact Type maintenance settings.
Tags vs. statuses — what's the difference
Tags are a fixed five-point scale you can't rename or add to: A – Hot, B – Warm, C – Neutral, D – Cool, F – Cold. Use them as a quick temperature read on how close a lead is to closing.
Statuses are fully customizable in Maintenance settings — add, edit, reorder, or deactivate them, and assign each one to a board column. Typical defaults are Open, In Contact, Open Offers, Processing, and Today's Sales, but you can shape this list around how your shop actually works.
You can't delete a status that's still assigned to any lead — the system blocks it until those leads are moved or reassigned first.
Working with many leads at once
Select multiple rows in the grid with the checkboxes to unlock bulk actions:
Export Selected — download the selected leads as a CSV.
Promote to Client — the main way a lead becomes a customer. This creates a client/company record from each selected lead in one click, then asks whether to delete the original lead rows or keep them for your records.
Create Tasks — build one task (title, type, status, due date, assignee, description) and apply it across every selected lead at once, instead of opening each one individually.
Send Campaign — hand the selected leads straight to the email campaigns tool.
Delete — remove the selected leads in bulk.
Importing leads
Use Import Lead to upload a CSV of existing leads.
Columns are auto-matched to lead fields by header name, and you can adjust the mapping before confirming.
A preview screen flags rows missing both an email and a phone number so you can catch incomplete records before they're imported.
What "Promote to Client" actually does
This is the one workflow worth understanding in detail, since it's how a lead turns into a real customer record:
Select one or more leads and click Promote to Client.
Each selected lead is used to create a new client/company record. If a lead already has a linked client, that one is skipped rather than duplicated.
Once the promotion finishes, you're asked whether to delete the original lead entries or keep them — there's no automatic cleanup, so this choice is yours every time.
A few tips
Use the "Without Task" filter weekly to catch leads nobody has followed up on yet.
Set your tag (A–F) the moment you talk to a lead — it's the fastest signal for prioritizing who to call back first.
Keep your status list short and rollup-mapped correctly so the board view stays useful; too many statuses without a board column just pile everything into Unassigned.
When you're ready to close out a batch of won leads, select them all and Promote to Client in one pass instead of one at a time.